Complete Guide to Soldering el Wire
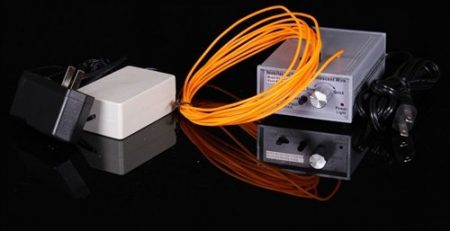
EL wire is a flexible, less power consumption light source that is easy to work with and can be used to light up things. EL wire (electroluminescent wire) is made from different wires that are covered with phosphor and plastic light. Soldering electroluminescent wire includes the following steps that are as followed:
Tools For Soldering EL wire
Soldering EL wire consists of the following tools that help in guiding the el wire. It consists of several and important tools of soldering EL wire that includes scissors, wire stripper, solder, welder, heat shrink tubing, heat gun, end cap, wire holder, etc.
Preparing The End Of The EL Wire
In the first Step to light up the EL wire, you just need a driver and sequencer. Driver and sequencer are used to deliver power to the wire the same as how a power brick delivers the power to your laptop. Whereas, it is easy to get a driver or a sequencer from where you have got the EL wire. While attaching the EL wire to the driver or sequencer, you need a harness or connecting wires. If you have the modules, you can get started to put the EL wire altogether. If your wires have already had their ends stripped, then you don’t need to do the first step.
Take out the wire cutter and stripped the colored PVC sleeve, start it from the end of the wire. You don’t need to cut all of the parts of the wire, you just have to strip off the covering of the colored PVC sleeve. After this step, you will be able to see a thinner clear PVC sleeve that is covering the core wire. You need to be so careful while cutting it because very small wires known as angel wires are beneath it. you will have noticed that there is phosphor coating on the wire.
Soldering The EL Wire
You need to slip up the heat shrink that is tubing over the end portion of the EL wire and push back the few inches of the wire. Next what you have to do is to wrap the copper tape around the PVC colored sleeve. Your wire must wrap the tape around the PVC. You need to pull the angel wires back and repair the copper tape. You must need to be sure that you melt the solder against the hot copper tape. Hold the angel wires with the tip of the solder whereas, if it is liquid solder then it dries because the wires stay fused to the copper tape.
Prep The Battery Pack Wire
It is stated that the wire that connects the EL wire to the driver, controllers, or sequencers has a white harness and different length wire ends. Furthermore, now you can cut the insulation off the tips of the wire that can connect the EL wire to the driver.
Attach The Battery Pack To The EL Wire
The next step is to twist the core wire from the EL wire with the help of the shorter wire from the black driver wire. It is known to be a great way if you move the longer wire out of the way by bending it back. Now you have to solder the connecting wires to the inner core of the EL wire cable. You don’t need to allow the longer wire to touch the wires you are just connected with. Hence you can use an electrical tape that is used to cover the other wires. The next step is to solder the battery pack wire with the help of the copper tape.
Shrink The Tubing
Now you need to shrink the tubing that you slipped over the wire that you were trying to join the wires in. to shrink the tubing, you can have used a heat gun or a hairdryer. The result comes that a tube will become warm but when it becomes cool it will be hard like how plastic is.
At last, you need to plug the join on the battery into the connection that is coming the way from the EL wire.
Conclusion:
It is to be concluded that as we know that EL wire is a thin copper wire that is coated with a phosphor to produce light through electroluminescence when a current is passed through it. whereas, soldering El wire, is a flexible, malleable, easily work with, less power consumption light source that can be used to light up the things.


LEAVE A COMMENT
You must be logged in to post a comment.